A few more summerlike days, and a few more astronomical shots.
It was sunny, and with a very good seeing from Thursday to Saturday night, just in time for Jupiter's opposition, when it's closer to Earth, and then bigger and easier to capture.
But since I wasn't very happy with my previous Jupiter shots, the first of these three nights I mainly took pictures of the moon.
I began by using my newest camera, an ASI 1600mm: it's more of a deep sky camera, not very suitable for planets and moon: 3.8 µm pixel size instead of 2.4µm of my other camera, an ASI 178mm, and bigger pixels means lower resolution. It also has a much wider sensor, which slows down capturing (and fast framerates is a key element to get high resolution images), but this is also an advantage from another point of view: I was able to capture the whole moon disk in just a single shot, instead of the usual mosaic.
This is the result, in my opinion one of my best looking images ever:
This weekend weather in London was quite amazing: sunny, a bit too windy, but sky almost perfect. Seeing forecast was also encouraging, so on Friday evening I took a chance to shoot at Jupiter.
It was a bit of an unlucky evening: firstly I discovered that I forgot my red dot finder on, so the battery was totally drained. After struggling for a while trying to align my GoTo mount without it, I decided it was worth to leave the telescope alone for a few minutes (my garden is easly visible from the street... I didn't want to do it unless absolutely necessary) and got back inside to find new batteries.
After everything was aligned, and I was ready to observe and record my images, I noticed that the image wasn't exactly satisfying at the eyepiece. When I replaced the eyepiece with the camera, the very unfocused image revealed me why: some tree branches were in the way, and of course the image was deteriorated from the interference!
I looked around me to see if I could find a better sp...
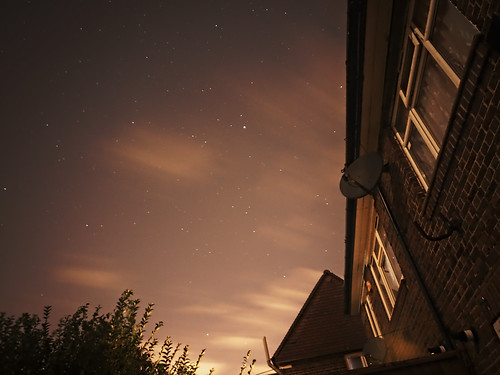
I'm currently living in a house with a very nice backyard, right outside London. Still a lot of light pollution, but it can be manageable, and useful for testing my equipment before running to darker locations.
This was meant to be a (L)RGB shot, but light pollution and humidity made the blue and green channels pretty useless, while red channel produced quite good results
Last friday night the sky was finally very clear, so I made a few shots.
M 42, HorseHead, Flame Nebula
Blog article: [url=http://blog.gulinux.net/blog/2016-11-29-wide-field-orion-nebula-flame-horsehead]http://blog.gulinux.net/blog/2016-11-29-wide-field-orion-nebula-flame-horsehead[/url]
The brilliant Orion Nebula (M42) is very well defined...
I recently bought a new smartphone, a OnePlus 3, since my Nexus 6 was pretty much dead, turning off pretty much everytime I did something else than keeping it in my pocket.
I was particularly interested in the "manual controls" feature of the OnePlus, including the ability to shoot up to 30 seconds, particularly convenient if you want to use it for astronomy.
It turned out this really works out well!
I just did a few tests, but the results are very promising.
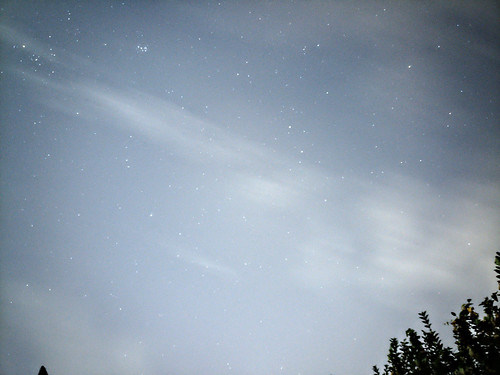
Taurus, Aries
Shot taken with OnePlus 3 Smartphone
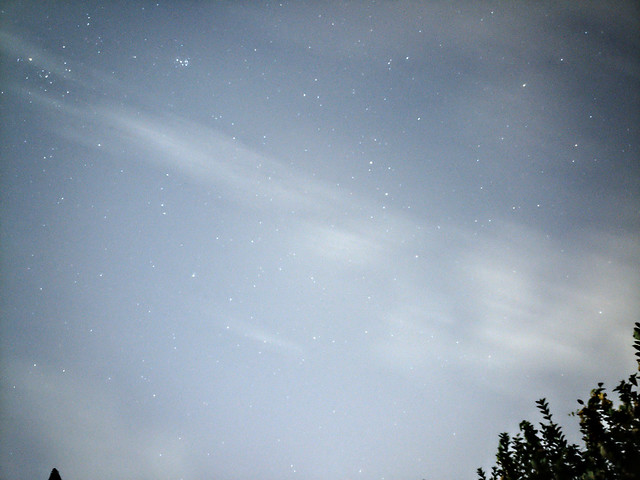
Lira, Delphinus, Aquila

Shot taken with OnePlus 3 Smartp...
It's been a while since my last updates. I recently moved to London, changed work, and.. changed astronomical instruments too. I'm planning to buy an ultra portable 300mm dobsonian soon, probably the best choice since I would like to travel as much as possible with it - back to Italy, or maybe to the southern skies.
But I also wanted a "quick" telescope, lightweight and simple, something that I could bring out in the garden in a very few minutes, and even better, ready for planetary imaging, so in the meantime I also bought a small Maksutov-Cassegrain telescope, a Celestron Nexstar SLT 127. I also got a new camera, USB3, with very high resolution and wider field than my previous one, a ZWO ASI 178mm, still a monochrome camera, but this time with RGB filter set.
Given the smaller aperture, I'm not expecting really great shots, but my previous setup much heavier, so I spent very little time observing and shooting, which in turn means I didn't really got it to its maximum potential.
...A very convenient tecnique in c++ programming is the one known with many names: "d-pointer" (found in Qt/KDE contexts), shadow pointer, "pimpl", opaque pointer. Basically the idea is to hide all the private details of a class in a forward declared private pointer, which will be the only real private member of the class. Since this member will never change, this will guarantee binary compatibility among different versions of a library.
But there are other advantages in using d-pointers: one is compilation speedup during development (usually if you change a private member of a class, the header changes, and you have to recomplile all units using that header, while with d-pointer you change only the .cpp file), and another is code cleanup: you will have very compact header files, describing your class public interface without private stuff pollution. Also, sometimes you may want to add your d-pointer definition in a separate header file, ending up with three well defined files:
- myclass.h: class declaration, only public stuff, without private stuff
- myclass_p.hpp: private class declaration: only private stuff, no implementations
- myclass.cpp: only implementations
The classical approach is to create a plain raw pointer to a forward declared class, initialize it in the constructor, and delete it on the destructor. A nice addition is to have the private class be a nested type, so that you can avoid polluting your IDE class list.
It has happened in a few occasions, to launch a command in a shell only after a command in another shell has successfully finished (for instance, after a long task like source code compilation, i want to launch tests on another shell).
This sunspot was particularly big, so I waited for the best moment to try and catch it.
Seeing wasn’t great, and my solar filter was a bit damaged, but the final image doesn’t look too bad anyway.
Sunspot 2546
Unfortunately, this will be the last image for a while.
Just a few hours later, someone opened my car, and took away my HEQ5 mount, together with all my eyepieces and the camera I used for all my planetary shots.
I’ll also be relocating in a while, so I’ll wait a few months before buying a new setup.
If someone is interested, I’m selling my current main optical tube here: http://www.astrosell.it/annuncio.php?Id=70007
This was meant to be an improvement to the previous ISS shooting, since I tried to do it with a bigger telescope, but the low altitude and the very bad seeing did actually worsen the quality.
The shape of the Space Station is anyway clearly visible, as it passes in front of the Moon. It is dark, this time, because it already entered in Earth shadow. We could actually see it rising, bright as usual, and then slowly fade until it completely disappeared just a few seconds before crossing the Moon.
Technical details of the shot can be found on the pagina Youtube.
ISS transit over the Moon - April 2016
This was meant to be an improvement to the previous ISS shooting, since I tried to do it with a bigger telescope, but the low altitude and the very bad seeing did actually worsen the quality.
Last august I had the chance to see the International Space Station passing in front of the moon right from my home.
The ISS is clearly visible many nights, and depending on the user position on Earth, it might align with some object in the sky.
These days I was reorganizing my gallery, and I found the original video.
So, after reprocessing it a while, I decided to republish it.
The ISS is really fast: the video is slightly slowed down. I remember that during the transit I couldn’t see the station, and I waited a few minutes because I couldn’t know if the transit already happened or not: it was still daylight, and in the original frames is barely visible.
Only after watching the video I could finally notice that tiny dot passing right in front of the moon.
ISS transits over the Moon
Video on youtube: [url=https://youtu.be/Fcwv85l20Xo]https://youtu.be/Fcwv85l20Xo[/url]
I shot this with my 130mm F/5 telescope, to be sure to have a field wide enough to not miss the space station.
It was still daylight, with the moon very low in altitude.
Also, I had to track the moon manually, since this telescope has a dobsonian mount.
For this shot, I used my old Celestron Astromaster 130, in an alt-azimuth mount, and my QHY5L-IIm as shooting camera. I had to try following manually the moon, since I obviously had no motorized tracking.
I had to use the 130mm scope instead of my main 8″ scope because of the shorter focal length: this way I could shoot almost the whole moon, so I could be sure that I didn’t miss the ISS.